Wednesday, May 30, 2012

Climate control and why you need it when renovating

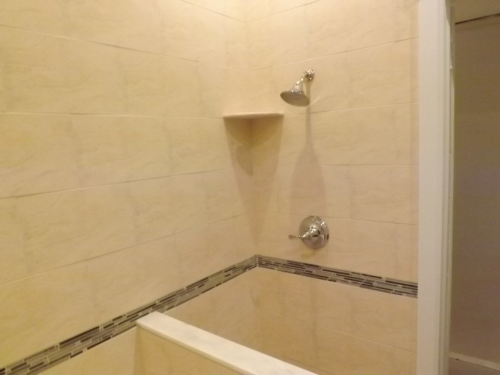
If you are renovating your home then the weather and the moisture levels of the home is something that should be seriously considered, but often overlooked. Moisture levels are a major threat to the home, and to any renovation work that you are doing. These levels are largely dictated by the climate you live in, so before you start you renovation works have a think about the climate you are in and consider hiring heating and drying equipment to make sure you have solved any existing moisture problems. This will help you prevent moisture from damaging your work when re decorating your home.

Damp

If you live in a wet climate, with plenty of rain and you do not have good guttering, then damp will show up on your walls in the form of dark patches. If you are planning to renovate an area suffering from damp, then drying out the walls using heating and drying equipment is a good idea, as painting over the area will not solve the problem. Damp is also one of those problems that looks relatively minor from the outside, however it is important to find out how extensive the moisture damage is so you can solve the problem appropriately. For a moisture problem such as damp, the heating and drying equipment that is best suited for the job are a de humidifier and a heat lamp. The dehumidifier is a great option as it will draw out all moisture from the walls and leave you with a dry surface. A heat lamp whilst you are renovating will keep the air dry so that if there is a problem with gutters and windows you will be able to spot them relatively quickly if they reappear. This equipment is available from all good tool hire companies.

Mould

Mould growing on walls is another moisture problem that can really damage your renovation works. Mould can be an indicator of damp or it could also mean that you have a leak. For a problem such as this you will need a piece of heating and drying equipment such as a heat lamp or a dehumidifier.

Paint, Plaster or Varnish not drying

If you are undertaking renovation works, and the paint or plaster that you are applying to walls is not drying, then you have a humidity problem on your hands. If you are working in a hot climate, you may be surprised that moisture is an issue for you, however it is a very common problem. If you are renovating in cold wet weather then you need heating and drying equipment such as a dehumidifier or a heat lamp. Pick a ceramic heater over a convector heater, as ceramic heaters are drier. If you are working in a warmer climate, then an air conditioning unit is the piece of heating and drying equipment that you need. When you look through heating and drying equipment you will notice that you have the option of an air conditioner or an air cooler. Pick an air conditioner as this dehumidifies the air whilst keeping it cool, an air cooler will add more moisture to the air.
Whatever your renovation project is make sure that the climate that you are working in is optimal.

Tuesday, May 29, 2012

My Little Lovey...

... is here!!  He was born last Monday (May 21st) in the afternoon and weighed 7 lbs 8 oz.

{There is no better feeling on this Earth than the moment when you first hold your baby}


...And here he is all cleaned up and in his nightie:


His name is Luke David & we are so in love with him.

 {Here he is with his Daddy- David.  We've barely put him down all week.}

Anyway, I just wanted to share our news with you & hope you're having a great week!  I'm not sure when I'll be back in -  I'm really trying to devote all of my attention to the family right now- but when I am I've got lots to share on what we've been doing around here. :)

And a note on the exhaustion/ coping level-  I have to say that with my husband home for 1 more week, we're doing pretty well.  Life with 3 boys is DEFINITELY an adjustment but so far, so good.  Right now, we're tag-teaming & it's really manageable but I'm a little nervous about when real life & work picks up & we're not only focusing on the family & life at home.  I'm trying not to think about it right now & to just recup & relax...  On that note, I'm also sooooo excited to get to work out again.  I gained 60 (!) pounds so I'm ready to RUNNNNN... :)  (I gained 60 with each of my other pregnancies too =  FUN.  not.) 

ok, I'm off.  Have missed you all!!


xoxo, Lauren
If you'd like help creating a home you absolutely love, contact me about our design services.

Saturday, May 26, 2012

Aging New Mason Jars and Lids


I have a few of the old blue mason jars with the zinc lids and love the look of them.  I've tried painting new canning jars with the Vitrea paint and heating them in the oven.  That worked well, but the Vitrea paint is somewhat expensive, even with a coupon.  I then found Suzanne's post on her blog Chickens in the Road about using Mod Podge, food coloring and water. 

I started with:
2 tablespoons Mod Podge
1 tablespoon Water
4 drops of Blue Food Coloring
1 drop of Green Food Coloring

I mixed those in a bowl, then played with the food coloring to make it more blue, although it stayed somewhat green... 


I poured some of the mixture in the clear canning jar and swirled it around until everything was covered.  I tried to let any excess drip out.


You will only be putting the color on the inside and please be aware that because it's Mod Podge, you cannot add water to these.  The color will come off.  I would not put food in them either.

Suzanne recommended using parchment paper, then foil on a cookie sheet.  I put those down and set the jars upside down on the parchment paper.  It continued to drip out, so I moved the jars around so they wouldn't have a pool of the mixture at the bottom.

I then put them in the oven at 200 degrees.  After a few minutes, I pulled them out and using a hot pad to hold the jar, carefully wiped off the excess with a paper towel.  (Even though I did this,  there was still a lot of excess even at the end of the process...) 

I put them in the oven for about 35 minutes total.


It's funny how different the colors look here, but once they were done, I couldn't tell them apart.


After the 35 minutes, I pulled them out of the oven and let them cool for a few minutes.  I didn't get a picture of this step, but there was a fair amount of goop that had pooled at the lip of each jar.  I used plain steel wool and wetted it with a little water to remove the goop.  I had to be careful not to rub the steel wool too hard into the jar, only on the lip where there was a lot of excess.


Now that I had bluish-greenish jars, I decided to see if I could make zinc looking lids.

I found some Dophin Grey paint and mixed it with Black Antiquing Gel.  I only used the antiquing gel because I couldn't find a bottle of regular black paint...


I used a 1" foam brush and dabbed it on until it looked rough enough.

I let it dry and kept adding a little more paint and texture until it looked right.  


I really like the way they turned out. 


I like the look of sand and shells in them too.


Thanks for your visit!

Pam


I've been nominated for Best Innovative Blog at Palatin Remodeling.  I'd love it if you would vote for me.


I am linking to the following parties:


>Funky Junk's Saturday Nite Special

Chic on a Shoestring Decorating

Wednesday, May 23, 2012

Before & After: Serving It Up in St. Albans


For those who don’t know, St. Albans, Queens was a bit of an epicenter for the jazz movement and, in general, of African American music. James Brown, Miles Davis, John Coltrane, Ella Fitzgerald and Fats Waller all called it home for substantial parts of their lives, and it was the birthplace of A Tribe Called Quest, arguably the best hip-hop group to ever exist.

We weren’t doing anything nearly as important out in St. Albans this past week, remodeling a kitchen and installing windows, but to the family we were working with and for, I imagine it meant quite a lot. Brand new cabinets were installed, along with those lovely granite countertops. We replaced the near-ancient oven with a brand new stovetop oven, and we added new pendant light fixtures that I'm particularly proud of. There was some major wall work and a little tiling work and we replaced all the light switches in the kitchen. The customer decided to keep her old fridge but we made a nice recessed space for it to help with the décor. Unlike most of the pictures I post, these were taken after the customer had settled into the new space. Nice, homey kitchen, don’t you agree?


Before: 


After:


Thursday, May 17, 2012

Before and After: BK Bathroom


I’ve been a bit of a slacker with uploading pictures – a common sin for those who are chronically busy. I had a free moment earlier today, however, and got to put up these photos of a bathroom we are almost finished with. New tile work both on the floor and walls, plus a new backsplash, tub and shower. We also installed brand new vessel sinks, light fixtures, vanity mirrors and toilet. Very nice design overall, heavy on tans, blacks and dark and light browns. We’re doing some very minor finishing touches on the shower today but this is the essential look of the place. What does everyone think? 


Before: 


After:


Wednesday, May 16, 2012

Time to Chill...


...This might possibly be me checking out/ signing off for a little bit.  I'll either be back with baby news or back because relaxing's not always in my nature & it's hard for me to keep quiet for very long. ;)


xoxo, Lauren

If you'd like help creating a home you absolutely love, contact me about our design services.

Tuesday, May 15, 2012

Rugby Star’s Tiling Challenge Goes Viral

Former international rugby player Lewis Moody M.B.E was called upon to test Elastoplast’s new Extra Tough plaster and it proved a huge success!

The ex-rugby captain and part-time DIY guru has become a viral hit after taking on a Vertical Tiling challenge.

The 33-year-old has turned into a huge sensation on YouTube after being videoed trying to tile a wall whilst being tied to a rope. The ‘Extreme DIY with Elastoplast Extra Tough’ clip involves the sportsman running back and forth with plaster and tiles in a nail-biting race against the stopwatch but the tongue in cheek video shows him falling all over the place as he is catapulted back by the spring.

Despite spilling plaster all over himself and being in a race against the horn, Moody shows just how super sticky, durable and waterproof the new plasters are no matter how extreme the DIY task is!

But why was the sportsman the perfect candidate? The English rugby union player from Berkshire recently announced his retirement from the game in March of this year. With so much spare time on his hands, he has starting to enjoy a spot of DIY as well as take part in extreme sports like wakeboarding. And as many people know, accidents can happen when participating in dangerous sports as well as trying to put up a shelf or fix a leaking tap around the home.

The video has already received over 100,000 views and if you fancy checking out the hilarious clip you can watch by clicking the video below or by clicking here. Next week Brits can watch how the Extreme Tough plaster copes against bandsaw skateboards!

Monday, May 14, 2012

The Nesting Continues...


This baby needs to come soon because my house is under attack.  (by me) 

{Most recently, I went after the lower level family room.  It's now cream/ white instead of blue.}

The room has gone through a few different phases over the 3 years we've lived here...

{I had an old ship painting from my son's nursery when we first moved in so hanging it made the place feel sort of coastal - which it isn't.}

At first I went with blues & orangey-golds & beiges, using the things from our old house.


Later I added in some more little coastal paintings I already owned and a crazy faux bois lamp.  ( I love this lamp & realize it's one of those pieces that doesn't appeal to most people but that I just have this strange kitcshy love for.)  ....


The room never really sat right with me, mostly because the fact that the coastal things in it didn't fit the house.  One day about a year ago, craving a change, I brought in one of my favorite rugs & tried out some teal curtains & it was just very wrong.  Totally not the fun happy space I wanted.  I think it only stayed like this for a few hours before I changed it...


 ...To this:

{I was getting there with the green addittion.  Green's my favorite color & more than that, to me it fits my house because we're surrounded by trees and have lots of windows in our house.  The outside is the backdrop for the interiors.}

In this pic below, you can see a couple of the windows in the family room's workspace during the Winter:

{photo by Helen Norman}

For a while now, I've been ready to say goodbye to the blue & bring in more white & green.  We just haven't had the get-up-and-go to actually do it... Until I neared 9 months of pregnancy.  OF COURSE that's the perfect time to attack the basement!  (I really love my husband for humoring me.)  We finished adding shelves to a little built-in book area...

Getting the book situation under control has helped immensely. Our family loves to read & not only read, but keep & collect the books we love. So... that's a major storage issue for us. We have books crammed everywhere. Adding the additional shelves in the nook has been life-saving (for now ;)

I'd like to make some botanicals with the kids out of the plants in our yard for the two frames above. 

{Maybe something like the ones we made for the playhouse}

SIDENOTE: Another thing I should probably explain is my obsession with botanicals & plants in general.  I've always loved them, and as a little girl, I had flower presses & enjoyed collecting pretty things to press.  When I was a little older (maybe around 12 or 13) I got very into researching herbs & flowers & plants.  I collected (still do ;)  books on them & the various medicinal uses for plants along with the folklore & & legends that surround them.  I actually have an "Herb journal" where I've collected all of the different information from various sources about the herbs I had access to complete with my own photos.  (Yes, I'm weird, I know this.)   Remember my zit cure, here? (pic below)

{Please don't be scurred.}

In high school I began making (and selling!) things I made out of herbs & oils.  (Lip balms, lotions, teas, natural body sprays, etc...  In college, my best friend & I sold more of the same things & expanded into pillows & clothing.  SO...  the reason you see lots of botanical artwork & nature-inspired spaces in my work is because it's something I'm really passionate about & it comes out, especially in my personal spaces & textile line. 

And now back to the family room....  It's finally getting to where I'm happy with it.  It just feels so much more in keeping with our house:


{While we have lots of vintage educational charts around the house, these two are actually reproductions from The Evolution Store.  I went with cowslip & anemone.  I'd gotten it narrowed down to five options and let my 4-year old pick.  (What 4 year old can resist the name "cowslip?" ...And we have peonies (from the anemone family) in the backyard.)

And for the rest of the space...
I want to add some BRNO chairs around the table & I'm looking for the perfect ones with old-looking brown leather... Similar to this but not quite: (This pic looks like suede to me.)


My Gustavian desk is going black (it's a few pics up & is currently pale aqua)  & I'm slipcovering my Madhatter Chairs in a natural linen & flanking the hutch with them:

{Madhatter Chair}

Everything else just got a bit restyled & of course that'll sort of continue.  I'll take more pics when I can.

On the pregnancy front:  Having contractions but nothing strong enough to constitute labor yet.  With my past two pregnancies, my water just broke with no warning, so that was fairly straight-forward.  This contraction thing is a little different for me so I'm wondering how this one will be.  Here, our  whole family saying hurry up! hi!! ;) to the new baby:

And it's bigger than it looks here.  my husband & I have big hands ;)


xoxo, Lauren

If you'd like help creating a home you absolutely love, contact me about our design services.