Showing posts with label terracotta pots. Show all posts

Thursday, March 8, 2012

Special Gifts from a Special Friend

A few years ago, I was on the Rate My Space site and met some really talented people.  Heather, who was one of the most talented ladies on there, happened to live a couple of hours from me.  After getting to know each other through our garden postings, she invited me to an antique show in her area.  Another friend and I headed the 100 miles to meet her in person and shop, shop, shop.  We had a great time!  Soon after that, my husband took a job 800 miles away, so we moved.  Well, luckily, our son decided to go to college in the same town she lives in!  Now every time we visit our son, I get to spend time with Heather!  Her home and garden are absolutely gorgeous and she knows the best shopping places in the area. Colby Cottage and Treaures from the Heart Blog are two favorites that she's introduced me to.

Today I received a box full of gifts for my birthday from Heather.  Oh, she knows me so well!!

A nest and eggs. I love the materials underneath it.


 I think it looks great on this old scale.  Now if I can keep the cat from playing with the eggs...

I love this old fan!


 She sent this mini cake plate.  I like how it holds another nest perfectly.


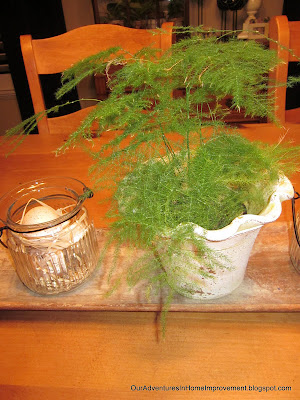
 This ruffled terra cotta pot is so cute!


This is one of the gifts she sent me for Christmas.  Perfect!


We laugh that we started out as friends who met on the internet!  She is one of the nicest, most generous people I've ever met.  Thank goodness for the internet.  :)

Thank you for your visit.

Pam

I am linking to the following parties:


Tuesday, August 23, 2011

Cute Little Topiaries


I love topiaries and had almost everything on hand to make some.  I have seen lots of blog posts on making them, so decided to try them myself.  It was a fun project.

I used the following materials:

  • terracotta pots

  • 2 1/2" styrofoam balls

  • 5/16" dowel

  • small block of styrofoam

  • bag of soft moss

  • bag of green moss

  • white paint

  • brown antique paint

  • glue gun and lots of glue sticks

  • foam brush


I started by painting the pots lightly with white paint,  then wiped some off using a damp paper towel.  I then applied some of the brown antique paint on very lightly.


I painted the dowels with the brown antique paint. I cut them to about 7".   I stuck the dowel into the center of the foam ball.  I added some hot glue in the hole to hold it.


I used the glue gun to apply hot glue in sections over the styrofoam ball.  I put the soft moss on it, using my hand to make sure it stuck.  (and tried to keep from burning the heck out of my hand)  :)  Once I got all of the moss on, I trimmed it a bit to make it into a ball shape.


I cut up pieces of the block of styrofoam and stuck it in the pot as tightly as I could. (This picture doesn't show the styrofoam wedged in the bottom of the pot, but it should)   I drizzled lots of hot glue in there to hold everything in place.  I then stuck the bottom of the dowel into the center.  


 I applied more glue, then stuck the green moss on top.


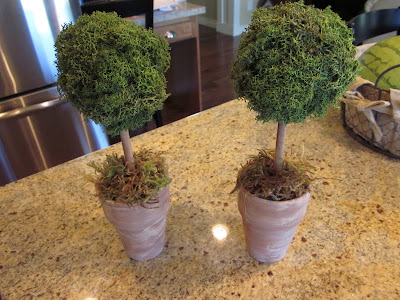
And here is the finished product.  I'm very happy with the way they turned out.  It was a messy project, but so satisfying!


Thanks so much for visiting and following my blog!